Below is a short video on how to
produce a News Item:
A few things to note are;
- Make your
copy
scannable- Online
visitors mostly scan
the copy rather than
reading every word of
it. If they can’t scan
your copy and get to
the information they
are looking for, they
will leave and move to
other website. To make
your content
scannable:
- Use headings and subheadings in
bigger fonts to navigate your
user
- Get straight to point
- Use bullet points
- Write in shorter sentences and
paragraphs
- Use images to illustrate your
point
- Write in your audience’s
language
Suggested article length is a
minimum of 500 words
What you need to upload a news
article
- Heading/Title
- Content
- Feature image
- Contact/Author
- Theme
Styling conventions
Upload
steps
- Log in to RLB.com site for your
region
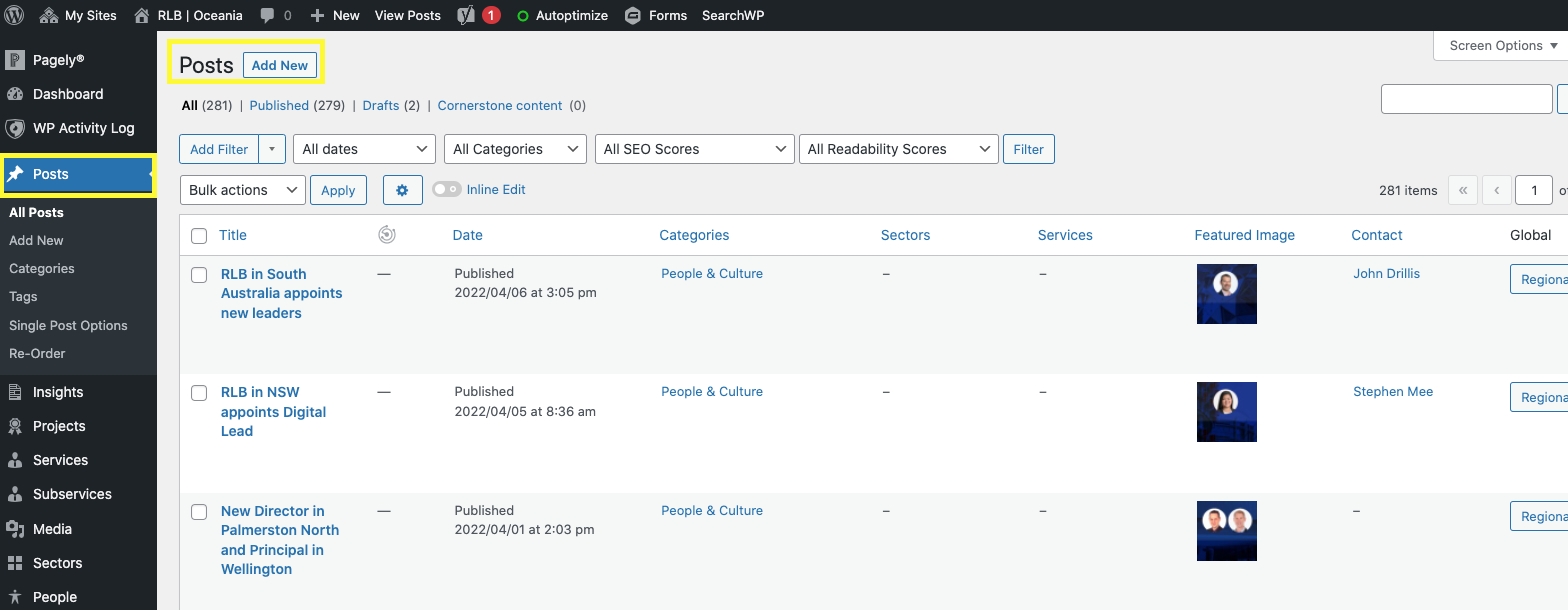
- When you arrive at the dashboard, click on
the ‘Posts’ option on the left hand
menu
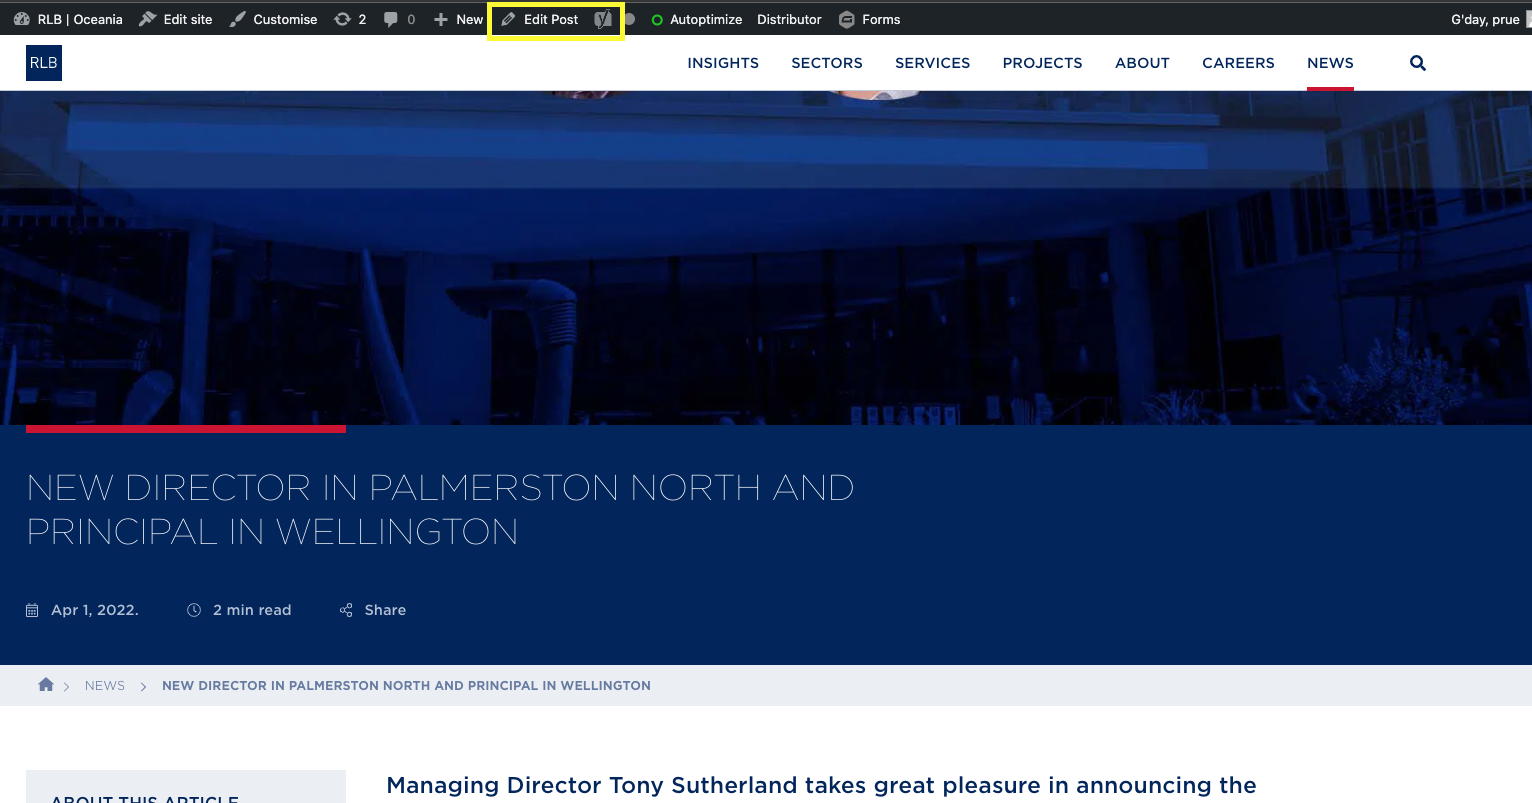
- To add a new news article, click ‘Add New’ in the top left corner. To make any changes to an existing insight,mouse over the title and click on ‘Edit’.
- Insert the news headline at the top. This will auto format to the right style so there’s no need to format.Remember, the title of the article will set the permalink of the article so keep that in mind when developing your title.
- Paste the remaining content in the body of
the article. Check the formatting (e.g.
spacing) to ensure it has carried
across.
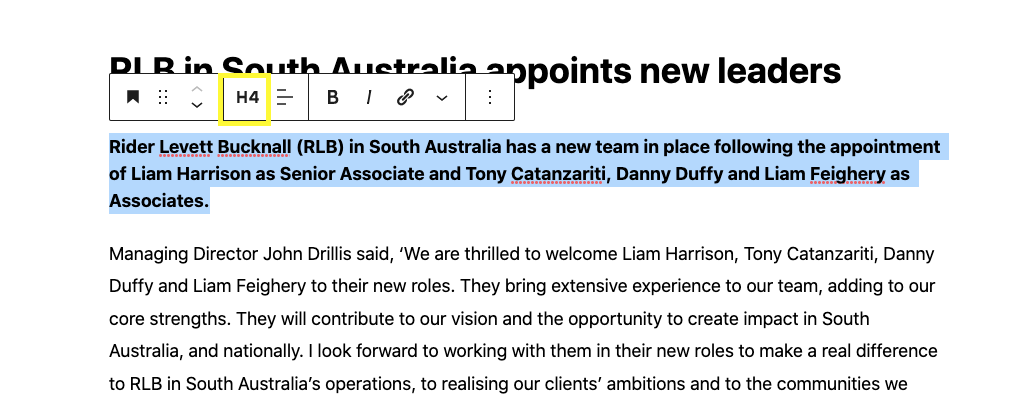
- Ensure the first sentence of the article
is formatted to an introductory sentence
as H4. To change the formatting, hover
over the item and click the far right left
option. This will allow you to select
‘Headings’. Once selected, choose
H4.
- If your article has subheadings, follow the above instructions to change all subheadings to H6 (heading 6). Remember, it’s important to use the heading tags instead of simply just bolding the text.This allows for search engines to read the content accurately and allows readers who are simply scanning to pull out the most important parts of the article.
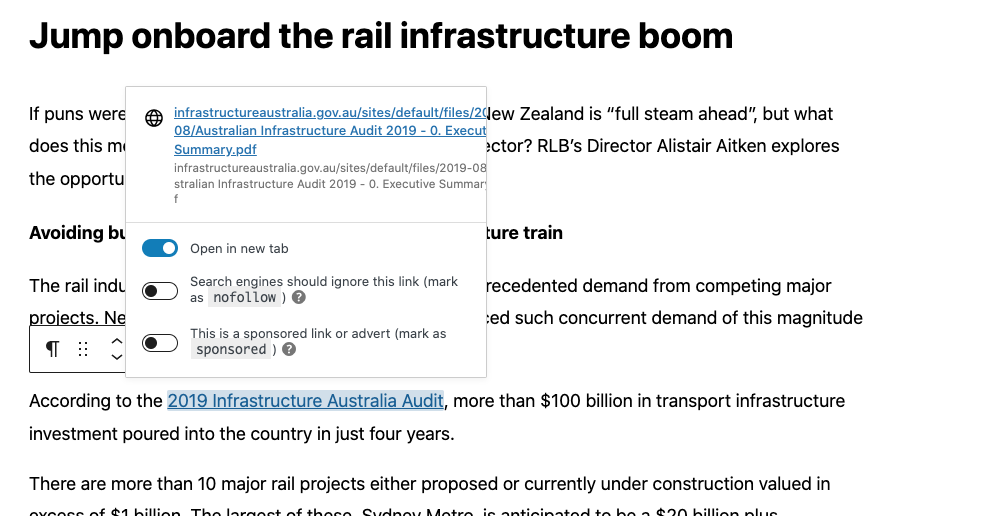
- For links inside the article, ensure that they are all set to ‘open in new tab’. To create a link, highlight the text you’d like to link and press Ctrl + K. Paste your URL and select ‘open in new tab’. Using ‘open in new tab’ ensures your audience doesn’t click away from the RLB site if they want to follow an embedded link. It will open a new tab in their browser and ensure they stay on the article page.
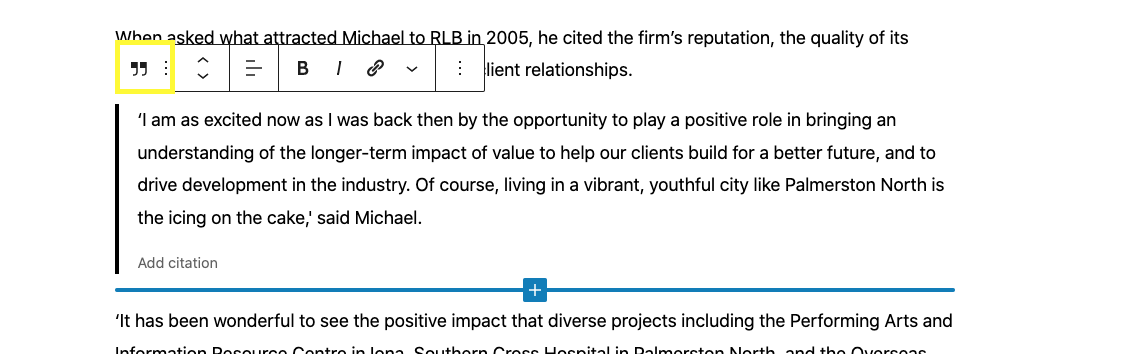
- To insert a quote, simply click on the ‘change block type’ on the left hand side of the menu bar and select ‘quote’.This will display as a feature in the final article.
- Whenever you create a news item, you will be creating it as a regional one so ensure that you only select the‘regional option’ towards the bottom of the page.

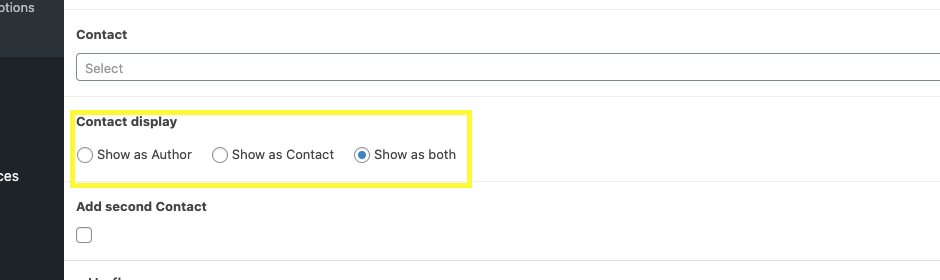
- If the actual article has an author, you can go ahead and start typing until it reveals the option.If the article only features ‘contacts’ (like the announcement of promotions/new hires) you can find that person’s details by typing in the dialogue box, and choose to feature them only as a contact. If the news piece is written by the person whose contact details you’d like to feature, you can select both.
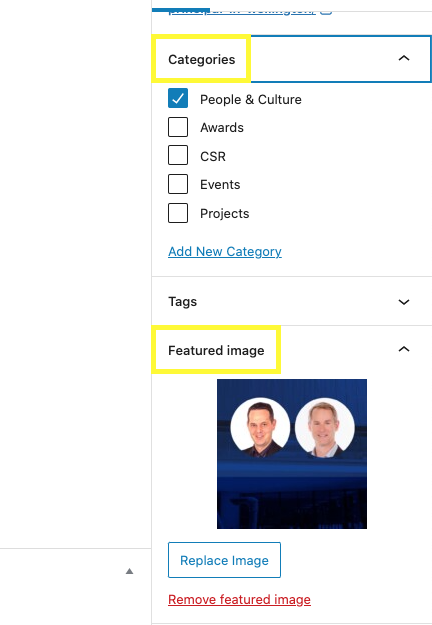
- To add a feature image, ensure you’re in the Post tab of the menu on the right hand side.From here, you can either select an image from the media library or drag and drop to upload a new image.
- Once you’ve set the feature image, ensure
you assign a theme to the article so it
can be appropriately indexed in
search.
- The options for categories are
currently:
- People & Culture
- Awards
- CSR
- Events
- Projects
To set your theme, you’ll find the
menu above the feature image. Select the
category that is most closely associated
with your article.
- Before you hit publish, ensure your
article has everything you need to include
by following this pre-publish
checklist:
- Heading
- Content
- Header image (minimum resolution 1080px)
- Author/Contact
- Theme
- Once you’ve checked your pre-publish list and hit publish, you’ll see an option pop up in the bottom left hand corner saying‘view post’. This allows you to see the post as a visitor would on the website.
- As soon as you publish, you can forward or
backdate the article as needed.

- If you have any changes to make, you can
simply click ‘Edit Post’ in the top menu
bar and it will take you back to the
article. Once you’ve made the required
changes, ensure you click ‘Update’.